-
content
- swift4 uinavigation + uitable 整合使用创建列表视图
- swift4 自定义UITableCell
- swift4 在tableView渲染之前加上加载动画(菊花,UIActivityIndicatorView)
- swift4 给项目添加tablayout布局,XLPagerTabStrip用法
- swift4 往视图控制器里添加视图控制器(往UIViewController里添加UIViewController)
- swift4 Moya简单使用,请求接口解析json
- swift4 UITableView 下拉刷新上拉加载 MJRefresh 自定义用法
- swift4 开发App,适配国际化,多语言支持
- swift4 UITableView 多个部分(Section)用法,实现一个通讯录
- swift4 扫描二维码(使用scanSwift实现)
- swift4 侧滑功能(使用DrawerController实现)
- swift4 UITabBarController 简单使用
- swift4 WKWebView使用JS与Swift交互
- swift使用webview加载本地html,html里引入本地的css,js
- swift4 App切换主题的实现方法总结
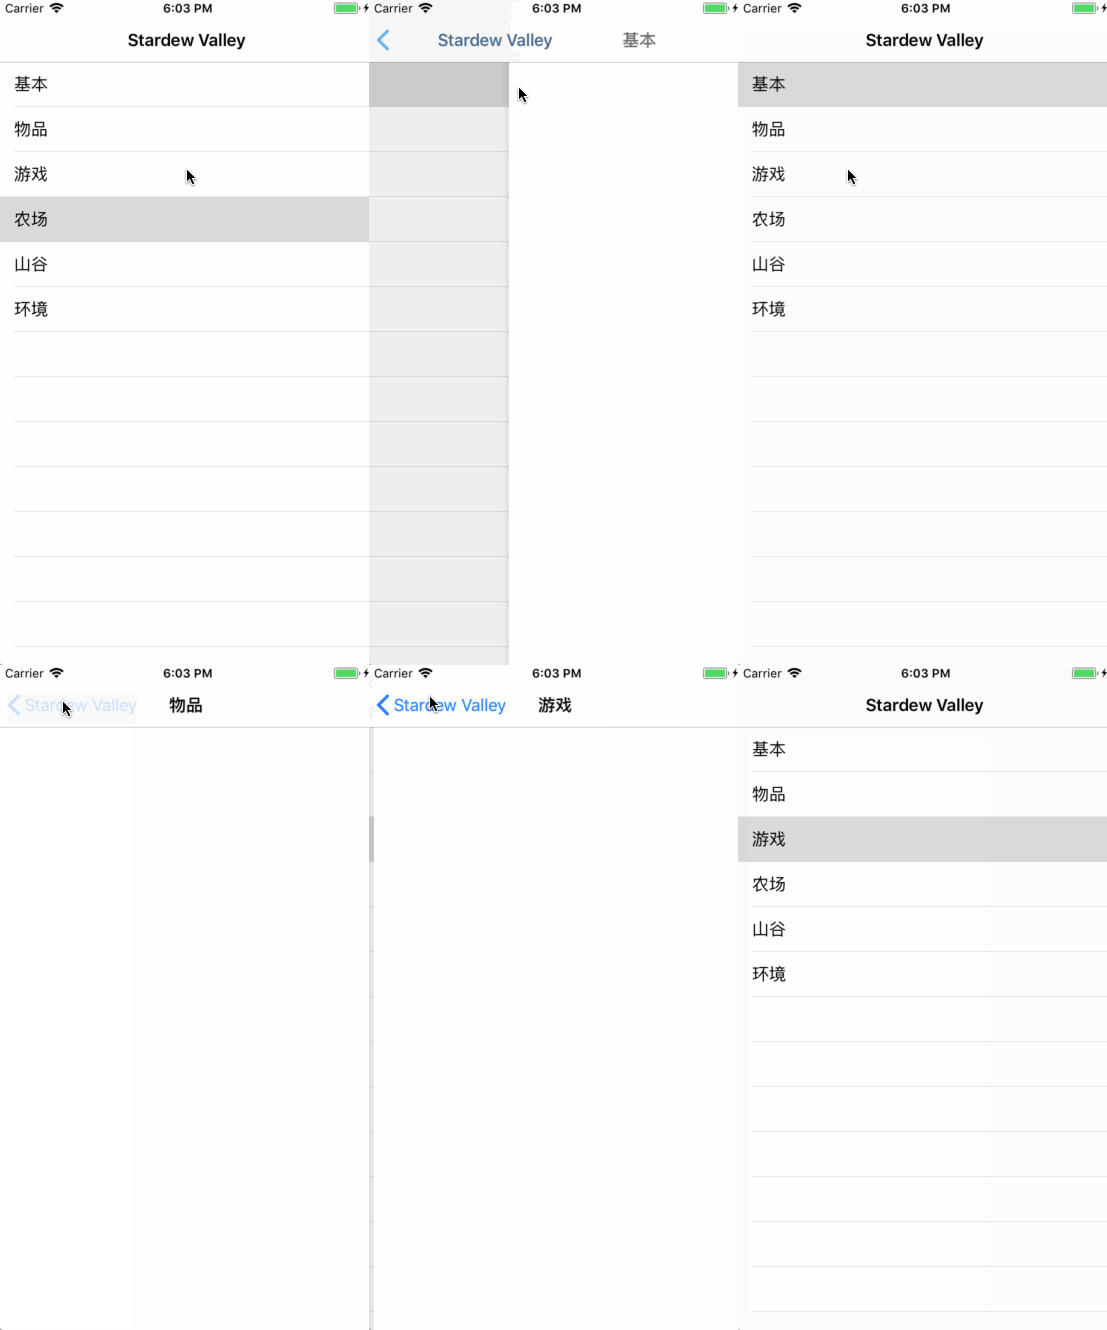
直接上图

新建项目
使用xcode新建一个单页面的swift项目即可
添加UINavigationViewController
直接在 AppDelegate.swift 文件里指定入口文件为 MenuViewController.swift 代码如下
func application(_ application: UIApplication, didFinishLaunchingWithOptions launchOptions: [UIApplicationLaunchOptionsKey: Any]?) -> Bool {
  // Override point for customization after application launch.

  let main = UINavigationController(rootViewController: MenuViewController())
  self.window?.rootViewController = main
  return true
}
上面指定了根视图后,运行app会发现 navigation 没有title,这时候就要在 MenuViewController 里加上 self.title = "Stardew Valley" 再运行就有了
现在 app 的UINavigationViewController有了,下面就要创建一个UITableViewController然后把这个tableView加到navigation里就可以了
创建UITableViewController
想让它渲染数据,要实现两个协议 UITableViewDelegate UITableViewDataSource 然后必须要实现里面的两个方法
//返回有多少行
func tableView(_ tableView: UITableView, numberOfRowsInSection section: Int) -> Int {
  return data.count
}

//渲染cell
func tableView(_ tableView: UITableView, cellForRowAt indexPath: IndexPath) -> UITableViewCell {
  let cell = (tableView.dequeueReusableCell(withIdentifier: "cellID", for: indexPath)) as UITableViewCell
  cell.textLabel?.text = data[indexPath.row]
  return cell
}
实现这两个方法还不行,还要在viewDidLoad() 方法里初始化dataSource 和 delegate 才可以用,因为 MenuViewController 是一个 UINavigationViewController 的根视图,所以在 MenuViewController 里还要把创建的 UITableView 添加到 当前视图里,它才会显示
渲染cell的方法里还有一个 withIdentifier 这东西也是要事先初始化的,代码如下
let data = ["基本", "物品", "游戏", "农场", "山谷", "环境"]

override func viewDidLoad() {

  self.title = "Stardew Valley"

  // 设置tableView显示的位置
  let rect = self.view.frame
  tableView = UITableView(frame: rect)

  self.tableView.backgroundColor = UIColor.white

  tableView.dataSource = self
  tableView.delegate = self
  //将tableView添加到当前视图里
  self.view.addSubview(tableView)

  //注册cell的Identifier,用于渲染cell
  self.tableView.register(UITableViewCell.self, forCellReuseIdentifier: "cellID")

}
写到这,启动项目就可以看到一个 Navigation 里有一个列表,数据显示的就是自己定义的好的一个数组里的数据了
添加点击事件和跳转页面
tableView有个点击事件
//点击cell跳转新页面
func tableView(_ tableView: UITableView, didSelectRowAt indexPath: IndexPath) {
  let secondViewController = SecondMenuViewController()
  secondViewController.params = data[indexPath.row]
  self.navigationController?.pushViewController(secondViewController, animated: true)
}
这里用到了传值,我使用的方式比较简单,就是在初始化要跳转的 SecondMenuViewController 里定一个变量来接收一下就可以了
到这运行项目就可以实现上面gif图片里的效果了,下面是所有的源码
MenuViewController.swift
import UIKit

class MenuViewController: UIViewController, UITableViewDelegate, UITableViewDataSource {

  var tableView: UITableView!

  let data = ["基本", "物品", "游戏", "农场", "山谷", "环境"]

  override func viewDidLoad() {

    self.title = "Stardew Valley"

    // 设置tableView显示的位置
    let rect = self.view.frame
    tableView = UITableView(frame: rect)

    self.tableView.backgroundColor = UIColor.white

    tableView.dataSource = self
    tableView.delegate = self
    //将tableView添加到当前视图里
    self.view.addSubview(tableView)

    //注册cell的Identifier,用于渲染cell
    self.tableView.register(UITableViewCell.self, forCellReuseIdentifier: "cellID")

  }

  //返回有多少行
  func tableView(_ tableView: UITableView, numberOfRowsInSection section: Int) -> Int {
    return data.count
  }

  //渲染cell
  func tableView(_ tableView: UITableView, cellForRowAt indexPath: IndexPath) -> UITableViewCell {
    let cell = (tableView.dequeueReusableCell(withIdentifier: "cellID", for: indexPath)) as UITableViewCell
    cell.textLabel?.text = data[indexPath.row]
    return cell
  }

  //点击cell跳转新页面
  func tableView(_ tableView: UITableView, didSelectRowAt indexPath: IndexPath) {
    let secondViewController = SecondMenuViewController()
    secondViewController.params = data[indexPath.row]
    self.navigationController?.pushViewController(secondViewController, animated: true)
  }

  override func didReceiveMemoryWarning() {
    super.didReceiveMemoryWarning()
  }

}
SecondMenuViewController.swift
import UIKit

class SecondMenuViewController: UIViewController {

  var params: String?

  override func viewDidLoad() {
    self.title = params
    self.view.backgroundColor = UIColor.white

  }

  override func didReceiveMemoryWarning() {
    super.didReceiveMemoryWarning()
  }
}