上一篇跑通了springsecurity oauth2的授权中心授权流程,这篇来将内置的登录页和授权确认页自定义一下
引入Thymeleaf
在模块authorization-server下的pom.xml里引入模板引擎
<dependency>
            <groupId>org.springframework.boot</groupId>
            <artifactId>spring-boot-starter-thymeleaf</artifactId>
        </dependency>
修改配置
AuthorizationServerConfig 类里的 authorizationServerSecurityFilterChain() 中的授权页修改
// 之前
http.getConfigurer(OAuth2AuthorizationServerConfigurer.class)
                .oidc(Customizer.withDefaults());
//修改后
http.exceptionHandling(exceptions ->
                        exceptions.authenticationEntryPoint(new LoginUrlAuthenticationEntryPoint("/login")))
                .oauth2ResourceServer(oauth2 -> oauth2.jwt(Customizer.withDefaults()));
defaultSecurityFilterChain() 方法修改
//之前
http
                .authorizeHttpRequests(authorize -> authorize
                        .anyRequest().authenticated()
                )
                .formLogin(Customizer.withDefaults());
//修改后
http
                .authorizeHttpRequests(authorize -> authorize
                        .requestMatchers("/login", "/static/**", "/css/**").permitAll()
                        .anyRequest().authenticated()
                )
                .formLogin(form -> form
                        .loginPage("/login")
                        .permitAll()
                );
添加页面
在resources/templates里添加 login.html, consent.html
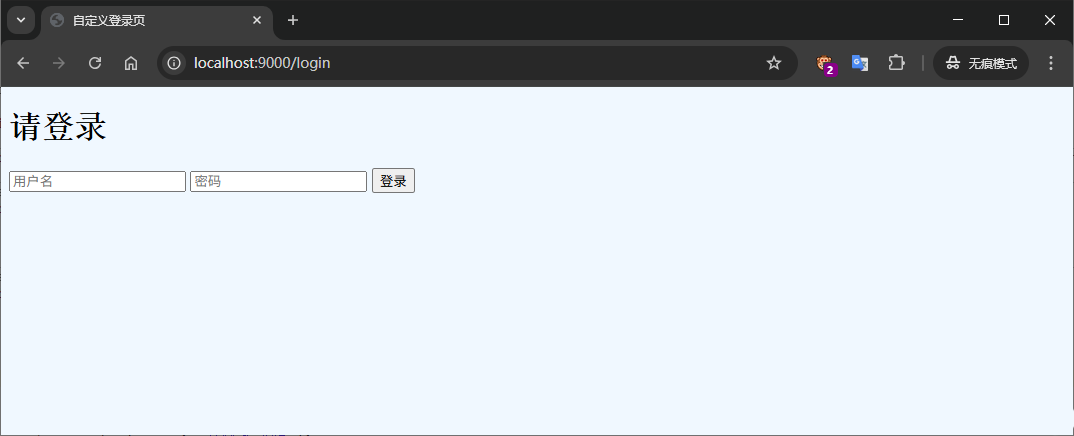
login.html
<!DOCTYPE html>
<html xmlns:th="http://www.thymeleaf.org">
<head>
    <title>自定义登录页</title>
    <link rel="stylesheet" href="/css/auth.css"/>
</head>
<body>
<h1>请登录</h1>
<form th:action="@{/login}" method="post">
    <input type="text" name="username" placeholder="用户名" required/>
    <input type="password" name="password" placeholder="密码" required/>
    <button type="submit">登录</button>
</form>
</body>
</html>
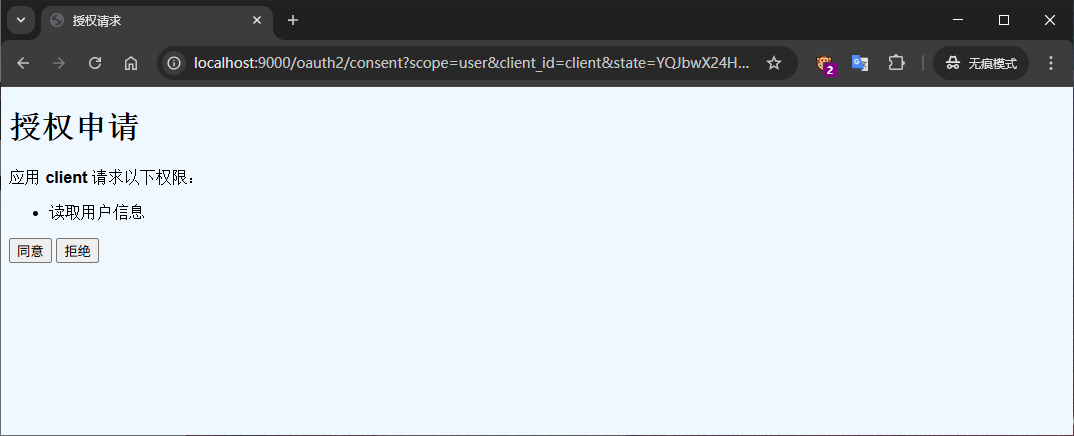
consent.html
<!DOCTYPE html>
<html xmlns:th="http://www.thymeleaf.org">
<head>
    <title>授权请求</title>
    <link rel="stylesheet" href="/css/auth.css"/>
</head>
<body>
<h1>授权申请</h1>
<p>应用 <strong th:text="${clientId}">客户端ID</strong> 请求以下权限:</p>
<ul>
    <li th:each="scope : ${scopes}">
        <span th:text="${scopeNames?.get(scope) ?: scope}">权限范围</span>
    </li>
</ul>
<form th:action="@{/oauth2/authorize}" method="post">
    <input type="hidden" name="client_id" th:value="${clientId}"/>
    <input type="hidden" name="state" th:value="${state}"/>
    <input type="hidden" name="scope" th:value="${#strings.arrayJoin(scopes, ' ')}"/>
    <button type="submit" name="user_oauth_approval" value="true">同意</button>
    <button type="submit" name="user_oauth_approval" value="false">拒绝</button>
</form>
</body>
</html>
创建一个css resources/static/css/auth.css
auth.css
/* static/css/auth.css */
body {
    font-family: Arial, serif;
    background-color: aliceblue;
}

.auth-form {
    max-width: 400px;
    margin: 0 auto;
}
添加controller
import org.springframework.security.oauth2.server.authorization.client.RegisteredClientRepository;
import org.springframework.stereotype.Controller;
import org.springframework.ui.Model;
import org.springframework.web.bind.annotation.GetMapping;
import org.springframework.web.bind.annotation.RequestParam;

import java.util.HashMap;
import java.util.Map;

@Controller
public class AuthorizationController {
    private final RegisteredClientRepository registeredClientRepository;

    public AuthorizationController(RegisteredClientRepository registeredClientRepository) {
        this.registeredClientRepository = registeredClientRepository;
    }

    @GetMapping("/login")
    public String login() {
        return "login";
    }

    @GetMapping("/oauth2/consent")
    public String consentPage(
            @RequestParam("client_id") String clientId,
            @RequestParam("scope") String scope,
            @RequestParam("state") String state,
            Model model) {

        // 创建 scope 到友好名称的映射
        Map<String, String> scopeNames = new HashMap<>();
        scopeNames.put("user", "读取用户信息");

        model.addAttribute("clientId", clientId);
        model.addAttribute("scopes", scope.split(" "));
        model.addAttribute("scopeNames", scopeNames);
        model.addAttribute("state", state);

        return "consent";
    }
}
测试
启动授权中心和客户端应用两个服务
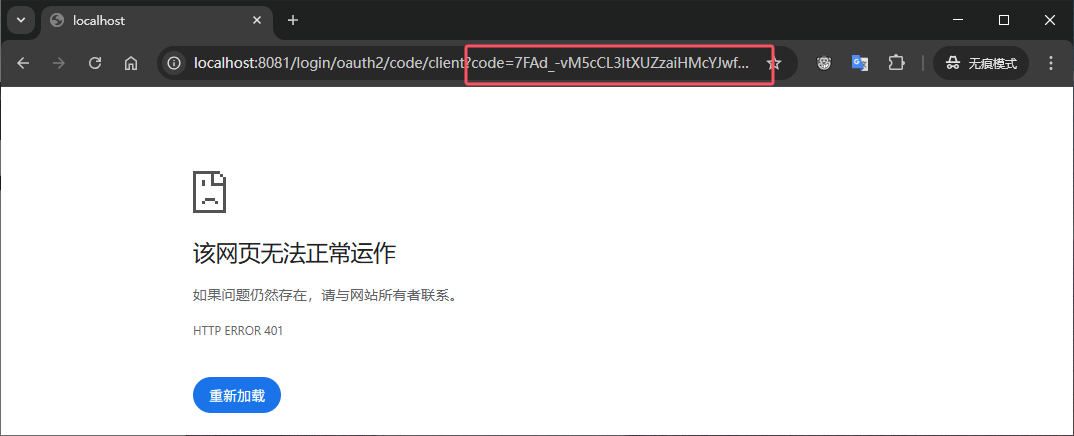
打开浏览器访问:http://localhost:9000/oauth2/authorize?response_type=code&client_id=client&redirect_uri=http://localhost:8081/login/oauth2/code/client&scope=user
跳转到登录页
输入用户名和密码登录成功跳转到授权确认页
点击同意,带着code回调到客户端应用提供的回调地址上