之间折腾过一篇使用springboot构建graphql接口项目的博客 传送门
这篇博客来折腾一下nodejs中使用express构建graphql接口项目的用法
hello world
mkdir graphql-js-demo
cd graphql-js-demo
npm init
yarn add express express-graphql graphql
创建文件 server.js 添加下面代码
const express = require("express");
const graphqlHTTP = require("express-graphql");
// const schema = require("./schema/schema");

var { buildSchema } = require("graphql");

// Construct a schema, using GraphQL schema language
var schema = buildSchema(`
  type Query {
    hello: String
  }
`);

// The root provides a resolver function for each API endpoint
var root = {
  hello: () => {
    return "Hello world!";
  }
};

const app = express();
app.use(
  "/graphql",
  graphqlHTTP({
    schema: schema,
    rootValue: root,
    graphiql: true
  })
);
app.listen(4000);
console.log("Running a GraphQL API server at http://localhost:4000/graphql");
启动
node server.js
浏览器访问 http://localhost:4000/graphql 输入
{
  hello
}
点击运行,会得到结果
{
  "data": {
    "hello": "Hello world!"
  }
}
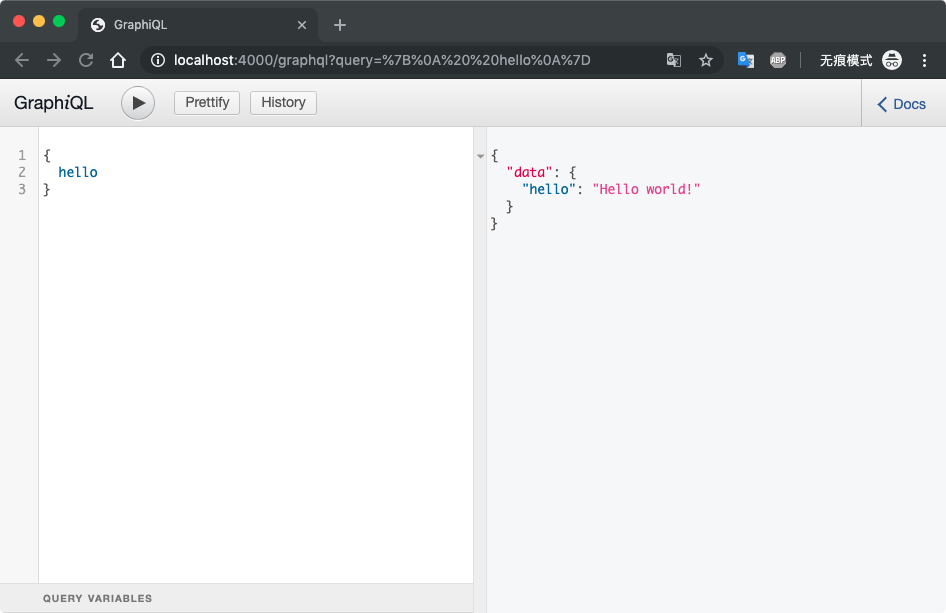
代码来自官网 https://graphql.org/graphql-js/running-an-express-graphql-server/
创建schema
上面只是一个hello world小程序,输出的也是一个静态的字符串,没有涉及到数据的查询,关联等
springboot构建graphql那篇博客里已经说过了graphql的大致运行思路
- 定义schema,也就是数据结构
- 定义查询方法,查询方法里去处理数据的查询以及关联查询等逻辑
定义一个 schema 创建一个文件夹 schema 在这个文件夹里创建一个文件 schema.js 专门用来定义schema和查询方法的
因为要涉及到模拟查询数据,这里要安装一下 lodash
yarn add lodash
const graphql = require("graphql");
const _ = require("lodash");

const {
  GraphQLObjectType,
  GraphQLSchema,
  GraphQLString,
  GraphQLID,
} = graphql;

// 模拟的数据
const books = [
  {
    id: "1",
    name: "java",
  },
  {
    id: "2",
    name: "spring",
  }
];

// 定义Book的数据结构
const BookType = new GraphQLObjectType({
  name: "Book",
  fields: () => ({
    id: { type: GraphQLID },
    name: { type: GraphQLString },
  })
});

// 定义查询方法
const RootQuery = new GraphQLObjectType({
  name: "RootQueryType",
  fields: {
    book: {
      type: BookType,
      args: { id: { type: GraphQLID } },
      resolve(parent, args) {
        return _.find(books, { id: args.id });
      }
    }
    books: {
      type: new GraphQLList(BookType),
      resolve(parent, args) {
        return books;
      }
    }
  }
});

// 构建schema并导出
module.exports = new GraphQLSchema({
  query: RootQuery
});
修改 server.js 内容
const express = require("express");
const graphqlHTTP = require("express-graphql");
const schema = require("./schema/schema");

const app = express();
app.use(
  "/graphql",
  graphqlHTTP({
    schema: schema,
    graphiql: true
  })
);
app.listen(4000);
console.log("Running a GraphQL API server at http://localhost:4000/graphql");
原接文链: https://atjiu.github.io/2019/05/31/nodejs-express-graphql-tutorial/
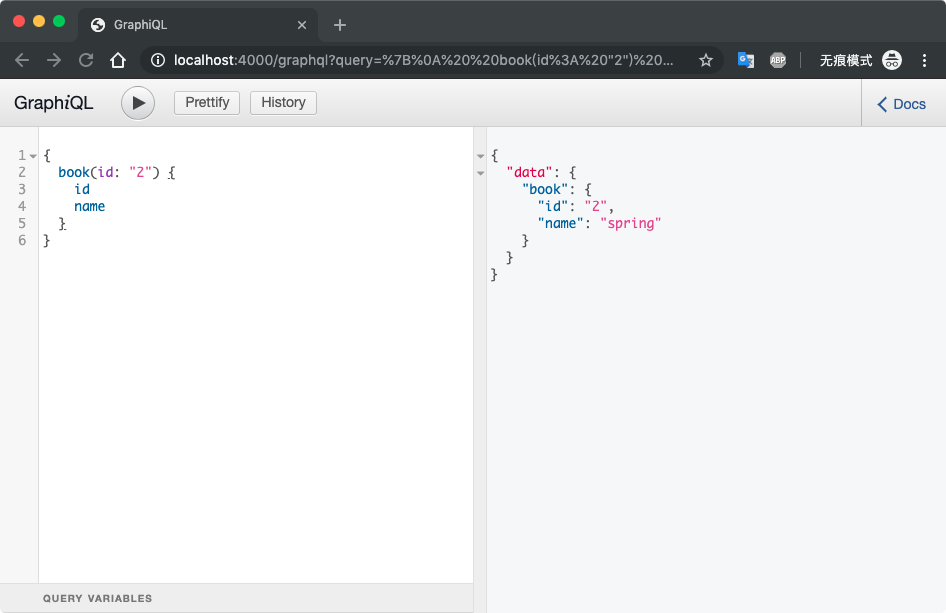
启动服务并查询结果如图
添加关联
有了书本了,现在加上书的作者 Author
关联关系是书本数据中都会有一个 authorId 字段,表示书本关联的 Author 的id,然后在BootType中去定义一个作者的信息,然后处理查询逻辑
const BookType = new GraphQLObjectType({
  name: "Book",
  fields: () => ({
    id: { type: GraphQLID },
    name: { type: GraphQLString },
    // 定义一个author对象,根据书本中authorId来查询作者的信息
    author: {
      type: AuthorType,
      resolve(parent, args) {
        // parent就是当前查询出的book的数据,下面就是从parent中拿到authorId数据再去authors中找作者的信息然后返回,这样数据就组装好了
        return _.find(authors, { id: parent.authorId });
      }
    }
  })
});
完整代码如下
const graphql = require("graphql");
const _ = require("lodash");

const {
  GraphQLObjectType,
  GraphQLSchema,
  GraphQLString,
  GraphQLInt,
  GraphQLID,
} = graphql;

const books = [
  {
    id: "1",
    name: "java",
    authorId: "2"
  },
  {
    id: "2",
    name: "spring",
    authorId: "3"
  },
  {
    id: "3",
    name: "nodejs",
    authorId: "1"
  },
  {
    id: "4",
    name: "python",
    authorId: "2"
  },
  {
    id: "5",
    name: "swift",
    authorId: "1"
  },
  {
    id: "6",
    name: "hibernate",
    authorId: "3"
  }
];

const authors = [
  {
    name: "tomcat",
    age: 12,
    id: "1"
  },
  {
    name: "jetty",
    age: 22,
    id: "2"
  },
  {
    name: "maven",
    age: 21,
    id: "3"
  }
];

const BookType = new GraphQLObjectType({
  name: "Book",
  fields: () => ({
    id: { type: GraphQLID },
    name: { type: GraphQLString },
    author: {
      type: AuthorType,
      resolve(parent, args) {
        return _.find(authors, { id: parent.authorId });
      }
    }
  })
});

const AuthorType = new GraphQLObjectType({
  name: "Author",
  fields: () => ({
    id: { type: GraphQLID },
    name: { type: GraphQLString },
    age: { type: GraphQLInt },
  })
});

const RootQuery = new GraphQLObjectType({
  name: "RootQueryType",
  fields: {
    book: {
      type: BookType,
      args: { id: { type: GraphQLID } },
      resolve(parent, args) {
        return _.find(books, { id: args.id });
      }
    }
    books: {
      type: new GraphQLList(BookType),
      resolve(parent, args) {
        return books;
      }
    }
  }
});

module.exports = new GraphQLSchema({
  query: RootQuery
});
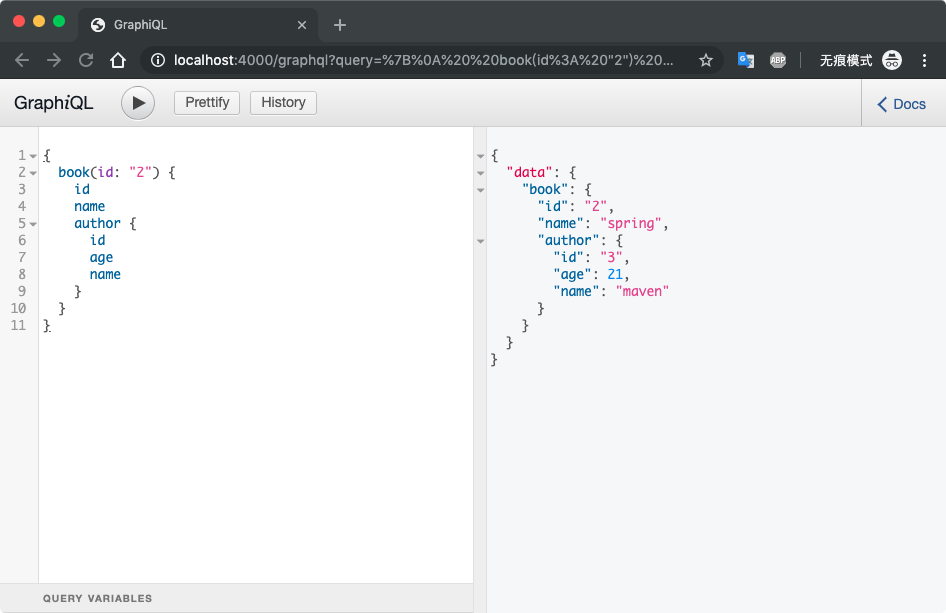
启动服务查询结果如图
关联查询
上面实现了查询书本信息顺便查询书本作者的信息,那查询作者顺便把作者下的书本信息也查出来怎么实现呢?
书 关联 作者 是 多对一
相反就是从一的一方查多的一方的数据,跟查书顺便查作者一样,在AuthorType里实现一个查询书的逻辑就可以了
不过一个作者可能有多本书,那么在作者里的书的类型就要是个list了,graphql里提供的有一个 GraphQLList 类型,用法如下
const {
  GraphQLObjectType,
  GraphQLSchema,
  GraphQLString,
  GraphQLInt,
  GraphQLID,
  GraphQLList
} = graphql;

const AuthorType = new GraphQLObjectType({
  name: "Author",
  fields: () => ({
    id: { type: GraphQLID },
    name: { type: GraphQLString },
    age: { type: GraphQLInt },
    books: {
      type: new GraphQLList(BookType), // 这里要用new的方式来定义类型,不能直接给books指定成GraphQLList
      resolve(parent, args) {
        // 同样的 parent 表示 author的信息,下面就是从parent里拿到id再去books数据里找authorId为当前作者的书本数据
        return _.filter(books, { authorId: parent.id });
      }
    }
  })
});
启动服务查询结果
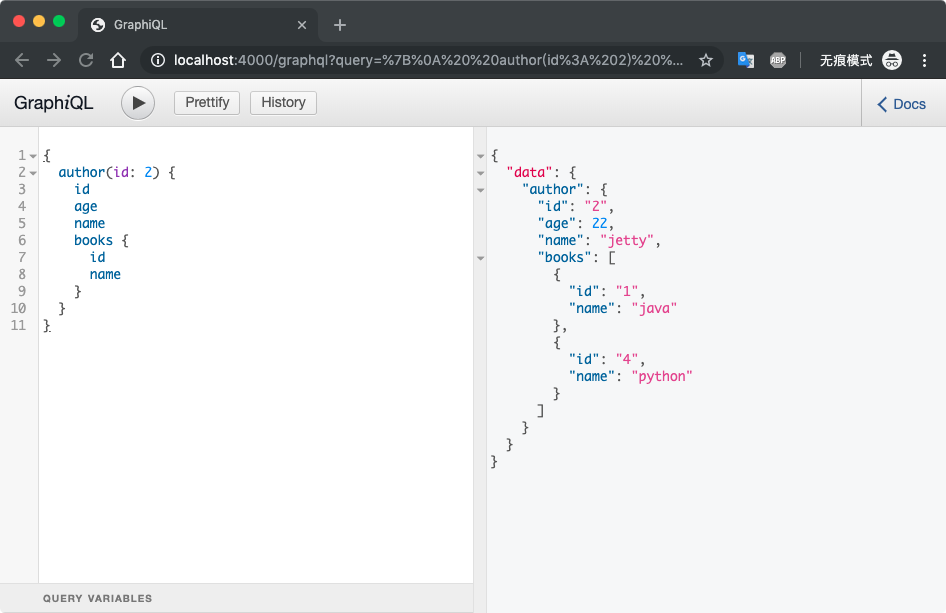
TIP:如果在查询作者的时候,不指定查询作者的书的信息,那么定义在AuthorType里查询作者书本信息的逻辑就不会走,省服务器资源,好评
文原接链: https://atjiu.github.io/2019/05/31/nodejs-express-graphql-tutorial/
连接数据库
安装mongoose
yarn add mongoose
修改 server.js
const express = require("express");
const graphqlHTTP = require("express-graphql");
const schema = require("./schema/schema");
const mongoose = require("mongoose");

const app = express();

// 连接数据库
mongoose.connect("mongodb://127.0.0.1/graphql-js-demo", {
  useNewUrlParser: true
});

mongoose.connection.once("open", function() {
  console.log("connected to database!");
});

app.use(
  "/graphql",
  graphqlHTTP({
    schema: schema,
    graphiql: true
  })
);
app.listen(4000);
console.log("Running a GraphQL API server at http://localhost:4000/graphql");
创建models
定义mongoose模型,创建 models 文件夹
book.js
const mongoose = require("mongoose");
const Schema = mongoose.Schema;

const bookSchema = new Schema({
  name: String,
  authorId: String
});

module.exports = mongoose.model("Book", bookSchema);
author.js
const mongoose = require("mongoose");
const Schema = mongoose.Schema;

const authorSchema = new Schema({
  name: String,
  age: String
});

module.exports = mongoose.model("Author", authorSchema);
修改 schema/schema.js
添加两个添加数据的方法
const Book = require("../models/book");
const Author = require("../models/author");

// other code...

const Mutation = new GraphQLObjectType({
  name: "Mutation",
  fields: {
    addAuthor: {
      type: AuthorType,
      args: {
        name: { type: GraphQLString },
        age: { type: GraphQLInt }
      },
      resolve(parent, args) {
        let author = new Author({
          name: args.name,
          age: args.age
        });
        return author.save();
      }
    },
    addBook: {
      type: AuthorType,
      args: {
        name: { type: GraphQLString },
        authorId: { type: GraphQLString }
      },
      resolve(parent, args) {
        let book = new Book({
          name: args.name,
          authorId: args.authorId
        });
        return book.save();
      }
    }
  }
});

module.exports = new GraphQLSchema({
  query: RootQuery,
  mutation: Mutation
});
启动服务调用 addAuthor addBook 两个方法保存数据
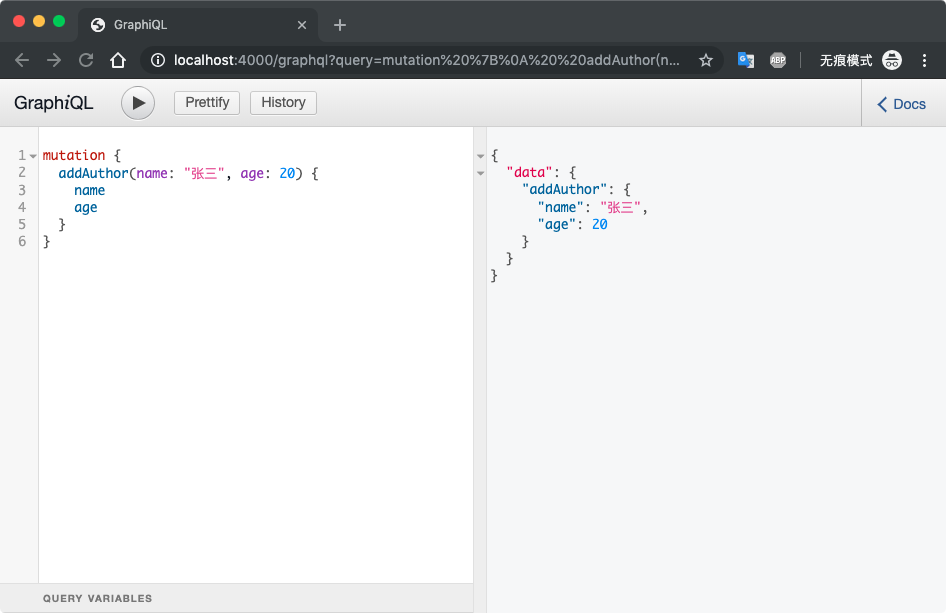
修改其它查询的实现,之前是从静态数据里筛选的,现在改成从mongodb里查,修改完后完整代码如下
schema/schema.js
const graphql = require("graphql");
const _ = require("lodash");

const Book = require("../models/book");
const Author = require("../models/author");

const {
  GraphQLObjectType,
  GraphQLSchema,
  GraphQLString,
  GraphQLInt,
  GraphQLID,
  GraphQLList
} = graphql;

const BookType = new GraphQLObjectType({
  name: "Book",
  fields: () => ({
    id: { type: GraphQLID },
    name: { type: GraphQLString },
    author: {
      type: AuthorType,
      resolve(parent, args) {
        return Author.findById(parent.authorId);
      }
    }
  })
});

const AuthorType = new GraphQLObjectType({
  name: "Author",
  fields: () => ({
    id: { type: GraphQLID },
    name: { type: GraphQLString },
    age: { type: GraphQLInt },
    books: {
      type: new GraphQLList(BookType),
      resolve(parent, args) {
        return Book.find({ authorId: parent.id });
      }
    }
  })
});

const RootQuery = new GraphQLObjectType({
  name: "RootQueryType",
  fields: {
    book: {
      type: BookType,
      args: { id: { type: GraphQLID } },
      resolve(parent, args) {
        return Book.findById(args.id);
      }
    },
    author: {
      type: AuthorType,
      args: { id: { type: GraphQLID } },
      resolve(parent, args) {
        return Author.findById(args.id);
      }
    },
    books: {
      type: new GraphQLList(BookType),
      resolve(parent, args) {
        return Book.find({});
      }
    },
    authors: {
      type: new GraphQLList(AuthorType),
      resolve(parent, args) {
        return Author.find({});
      }
    }
  }
});

const Mutation = new GraphQLObjectType({
  name: "Mutation",
  fields: {
    addAuthor: {
      type: AuthorType,
      args: {
        name: { type: GraphQLString },
        age: { type: GraphQLInt }
      },
      resolve(parent, args) {
        let author = new Author({
          name: args.name,
          age: args.age
        });
        return author.save();
      }
    },
    addBook: {
      type: AuthorType,
      args: {
        name: { type: GraphQLString },
        authorId: { type: GraphQLString }
      },
      resolve(parent, args) {
        let book = new Book({
          name: args.name,
          authorId: args.authorId
        });
        return book.save();
      }
    }
  }
});

module.exports = new GraphQLSchema({
  query: RootQuery,
  mutation: Mutation
});
参数非空校验
有些接口的参数是不能为空的,graphql里也可以做校验,用法如下
在schema/schema.js里引入 GraphQLNonNull 然后在 addAuthor 方法的参数类型上加上这个判断,如下
const Mutation = new GraphQLObjectType({
  name: "Mutation",
  fields: {
    addAuthor: {
      type: AuthorType,
      args: {
        name: { type: new GraphQLNonNull(GraphQLString) }, // 判断非空
        age: { type: new GraphQLNonNull(GraphQLInt) } // 判断非空
      },
      resolve(parent, args) {
        let author = new Author({
          name: args.name,
          age: args.age
        });
        return author.save();
      }
    },
    addBook: {
      type: AuthorType,
      args: {
        name: { type: new GraphQLNonNull(GraphQLString) }, // 判断非空
        authorId: { type: new GraphQLNonNull(GraphQLString) } // 判断非空
      },
      resolve(parent, args) {
        let book = new Book({
          name: args.name,
          authorId: args.authorId
        });
        return book.save();
      }
    }
  }
});
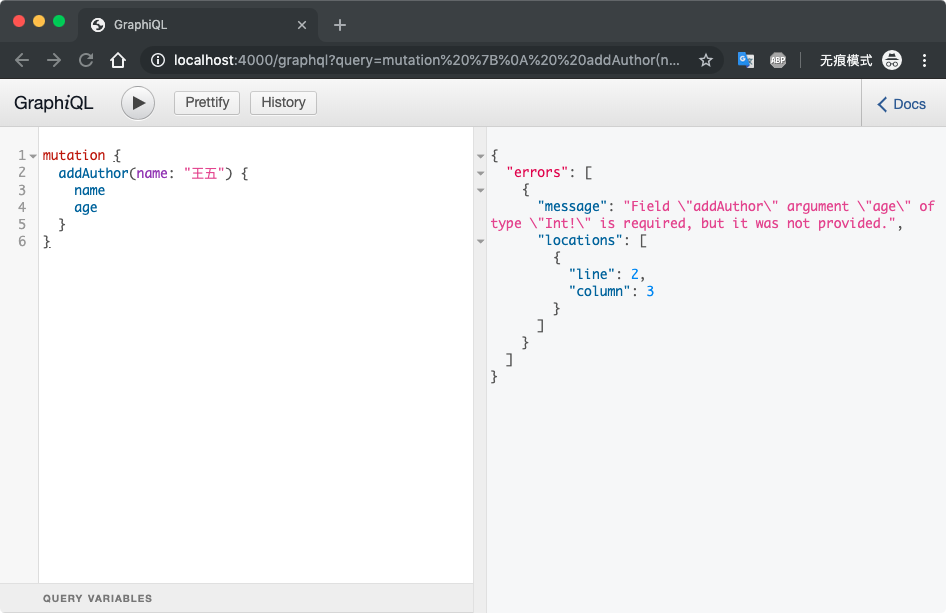
启动服务测试,如果有非空参数在调用的时候没有传,会报错
