PWA: Progressive Web Apps (渐进式Web应用程序)
用PWA技术开发的网页, 如果将其保存在手机桌面上, 很难将其与手机上其它app区分开, 另外它还自带了缓存, 推送功能, 简直不要太爽, 下面介绍一下PWA网页的开发过程
创建项目
这一篇不介绍推送, 因为推送要服务端支持, 所以这里只创建一个静态项目就可以了
创建一个项目文件夹(pwa-demo) 在文件夹里创建 index.html app.css app.js
开发功能
在 index.html 里引入好css, js文件, 如下
<!DOCTYPE html>
<html lang="en">
  <head>
    <meta charset="UTF-8" />
    <meta name="viewport" content="width=device-width, initial-scale=1.0" />
    <meta http-equiv="X-UA-Compatible" content="ie=edge" />
    <title>CNodeJS PWA</title>
    <link rel="stylesheet" href="app.css" />
  </head>
  <body>
    <!-- ,
  "splash_pages": null -->
    <h1>CNodeJS</h1>
    <div id="main"></div>
    <script src="app.js"></script>
  </body>
</html>
在app.js文件里写入请求接口的业务逻辑, 我这里用的是 cnodejs.org 的接口
const main = document.getElementById("main");

window.addEventListener("load", e => {
  loadTopics();
});

async function loadTopics() {
  const res = await fetch(`https://cnodejs.org/api/v1/topics`);
  const json = await res.json();
  main.innerHTML = await json.data.map(createTopic).join("\n");
}

function createTopic(topic) {
  return `
    <div class="topic">
      <img src="${topic.author.avatar_url}" alt=""/>
      <div class="title">${topic.title}</div>
    </div>
  `;
}
原接文链: https://atjiu.github.io/2019/05/23/pwa-cache/
给页面加上点css
.topic {
  display: -webkit-box;
  display: -ms-flexbox;
  display: flex;
  -webkit-box-align: center;
      -ms-flex-align: center;
          align-items: center;
  padding-top: 10px;
  padding-bottom: 10px;
  border-bottom: 1px dashed #222;
}

.topic:first-child {
  padding-top: 0;
}

.topic:last-child {
  border-bottom: 0;
}

.topic img {
  width: 40px;
  height: 40px;
  border-radius: 10px;
  margin-right: 10px;
}

.topic .title {
  -webkit-box-flex: 1;
      -ms-flex: 1;
          flex: 1;
  font-weight: 500;
  font-size: 18px;
}
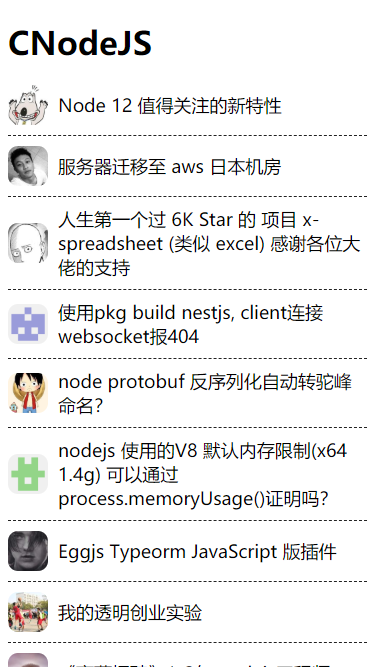
打开 index.html 可以看到长这个样

添加Manifest
可以打开这个网站 https://app-manifest.firebaseapp.com/ , 把一些网页的信息和icon图标都填上, 点击生成, 就完事了
我在chrome里用这个网站生成的zip包里死活没有icons, 后来换成firefox就好了,不知道为啥
icon原图最好是512x512大小的
生成好之后, 把zip包解压, 将里面的文件复制到项目里
然后修改 index.html 文件内容, 在head里加上下面内容
<head>
  <link rel="manifest" href="manifest.json" />
</head>
打开浏览器控制台, 可以在 Application 选项里看到 Manifest 的信息

添加 serviceWorker
现在给网页加上缓存, 这样只要网页加载过一次, 就会把请求的数据都缓存下来, 在没有网络的环境下就可以继续查看了
在 app.js 里注册 serviceWorker
window.addEventListener("load", e => {
  loadTopics();
  // 注册 serviceWorker
  if ("serviceWorker" in navigator) {
    try {
      navigator.serviceWorker.register("sw.js");
      console.log("serviceWorker register success!");
    } catch (error) {
      console.log("serviceWorker register failure!");
    }
  }
});
注册的 serviceWorker 文件名是 sw.js 所以要在项目根目录下创建 sw.js 文件
链原接文: https://atjiu.github.io/2019/05/23/pwa-cache/
然后加上如下代码
self.addEventListener("install", async event => {
  console.log('sw install');
});

self.addEventListener("fetch", async event => {
  console.log('sw fetch');
});
运行网页可以看到控制台里有打印 sw install 字样, 表示 serviceWorker 注册成功了
添加缓存
如果没有缓存功能, 好像没法将网页保存在桌面上, 下面就来添加浏览器自带的缓存功能
首先将项目里一些静态文件缓存了, 比如 app.css app.js 等
const staticAssets = ["./", "./app.css", "./app.js"];

self.addEventListener("install", async event => {
  const cache = await caches.open("static-assets");
  cache.addAll(staticAssets);
});
然后是对网络请求数据的缓存逻辑算是, 写法是固定的, 如下
self.addEventListener("fetch", async event => {
  const req = event.request;
  const url = new URL(req.url);

  if (url.origin === location.origin) {
    event.respondWith(cacheFirst(req));
  } else {
    event.respondWith(networkFirst(req));
  }
});

async function cacheFirst(req) {
  const cachedResponse = await caches.match(req);
  return cachedResponse || fetch(req);
}

async function networkFirst(req) {
  const cache = await caches.open("topics-dynamic");
  try {
    const res = await fetch(req);
    cache.put(req, res.clone());
    return res;
  } catch (error) {
    return await cache.match(req);
  }
}
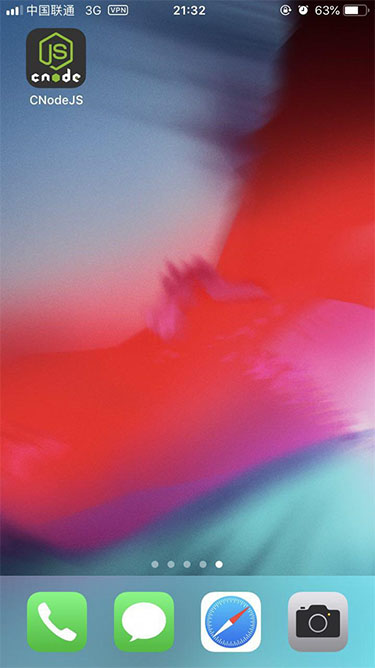
再次运行网页, 这时候就可以将其保存在手机桌面上了
不过当保存的时候会发现没有icon, 然后我百度了一下, 还要在 index.html 里配置上下面这些东西
<head>
  <meta charset="UTF-8" />
  <meta name="viewport" content="width=device-width, initial-scale=1.0" />
  <meta http-equiv="X-UA-Compatible" content="ie=edge" />
  <title>CNodeJS PWA</title>
  <link rel="stylesheet" href="app.css" />
  <link
    rel="shortcut icon"
    href="images/icons/icon-72x72.png"
    type="image/x-icon"
  />
  <!-- Specifying a Webpage Icon for Web Clip for Safari -->
  <link rel="apple-touch-icon" href="images/icons/icon-192x192.png" />
  <!-- Specifying a Launch Screen Image for Safari
  <link rel="apple-touch-startup-image" href="assets/imgs/splash.png" />-->
  <!-- Hiding Safari User Interface Components -->
  <meta name="apple-mobile-web-app-capable" content="yes" />
  <!-- Changing the Status Bar Appearance
  <meta name="apple-mobile-web-app-status-bar-style" content="black">-->
  <link rel="manifest" href="manifest.json" />
</head>
这样再用手机浏览器打开, 然后选择保存到桌面上,就有icon了, 保存成功后, 打开让数据请求接口加载完, 然后将手机网络关了, 刚打开的应用退出后台, 再次打开会发现数据照常加载了, 只不过是缓存里的

如果再给其加上推送功能, 是不是就跟手机上装的app没两样了, 下一篇来介绍一下serviceWorker的推送功能用法